Star Wars fans let out a collective gasp when Electronic Arts announced Star Wars: Squadrons in June. It looks every inch like the first-person, in-cockpit space combat game that fans have been waiting for since the original Star Wars: X-Wing and Star Wars: TIE Fighter classics. Even more exciting is the fact that it will be compatible with modern flight sticks, throttles, and virtual reality headsets — including PlayStation VR. Squadrons is scheduled to be released Oct. 2 on PlayStation 4, Windows PC, and Xbox One. That means the clock is ticking for you to build the dedicated cockpit you’ve always wanted.
I’ve spent part of the last few months of quarantine tinkering in my garage, refining my own flight simulation setup for use primarily with Elite: Dangerous. As designed, this same rig is also fully compatible with DCS World, MechWarrior 5: Mercenaries, Star Citizen, and War Thunder. I’ve also built it with an eye on Microsoft Flight Simulator, which is expected to arrive later this year.
Here are a few creative solutions I found for making a video game cockpit — also called a “simpit” — without breaking the bank, as well as a couple of must-have items to take your build to the next level. I’ll finish things off with a complete shopping list of everything I’ve included in my rig as pictured. Even if you’re not going whole hog with a VR headset, there’s still plenty of great information below.
Choose a platform

Photo: Katie Hall for Polygon
Right now, EA isn’t giving all the details on which peripherals will be compatible with Squadrons. It mentions PlayStation VR and Oculus-brand devices by name in its FAQ, and says the game will be compatible with other headsets as well. There’s also a full list of system specifications for the PC you’ll need to run it, both with and without VR. EA promises more information on which flight sticks and HOTAS (hands-on throttle and stick) solutions will be fully compatible sometime in the future. Polygon has reached out for more details.
My recommendation if you’re starting from scratch is to build your cockpit around the PC. That’s because there are already plenty of games that you can play on PC right now that can make use of a quality simpit, so even if Squadrons comes up short when it finally gets released you’ll still have some excellent games to play.
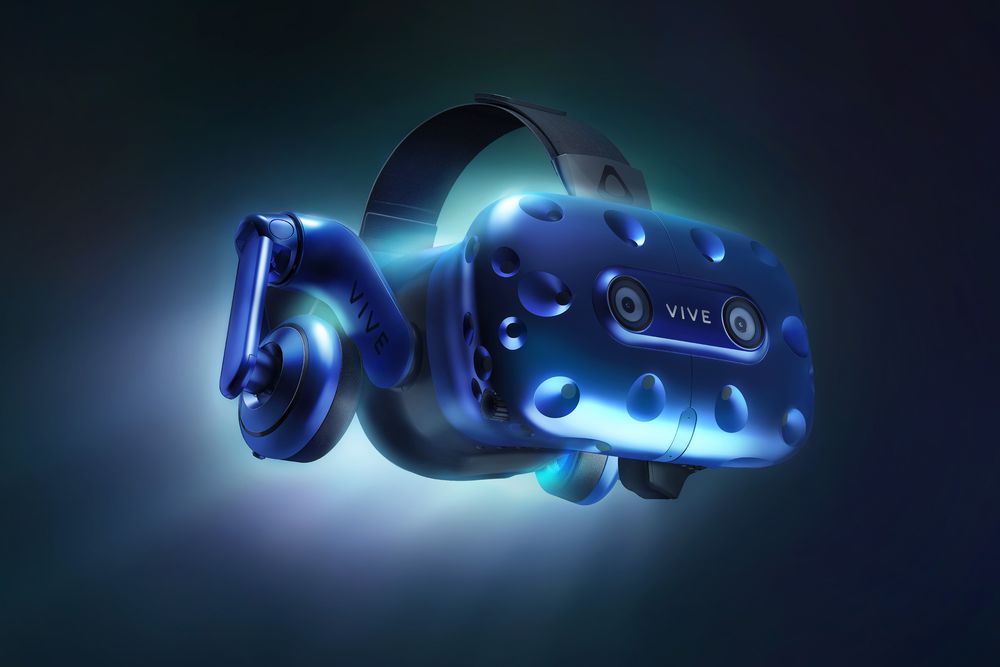
For my PC setup, I’ve opted for the HTC Vive Pro, mainly because that’s what was sitting around in the Polygon library when I started the build. There are plenty of excellent options right now for VR, and we’ve detailed all of the leading devices in our Half-Life: Alyx buying guide.
Choose a flight stick, throttle, and pedals
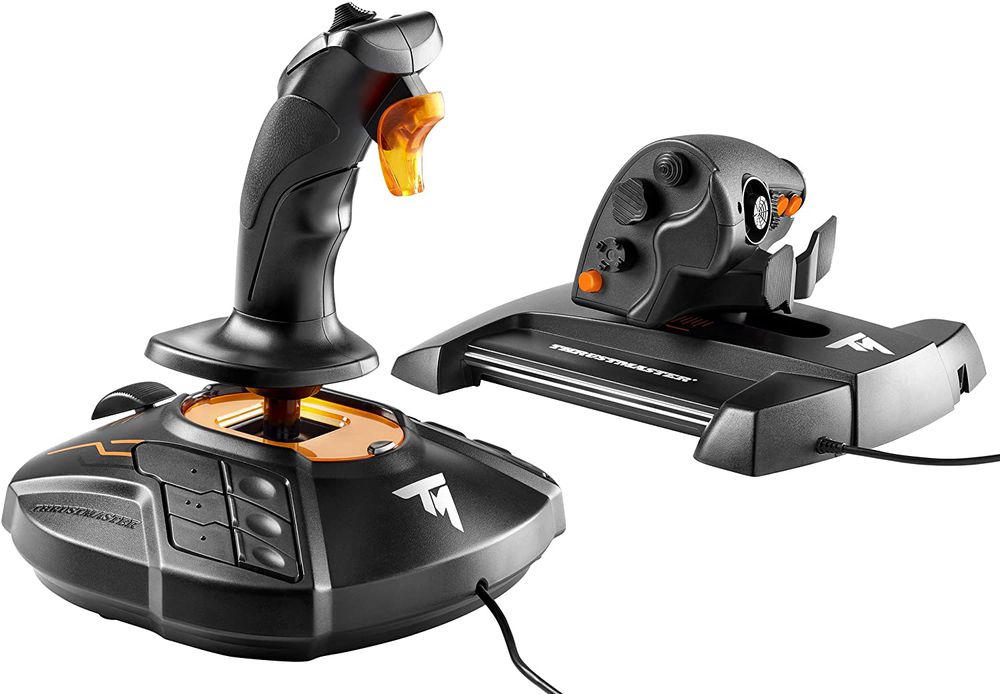
On PC, the two most popular commercial flight sticks on the market right now are the Logitech X52 and the Thrustmaster T16000M. Both are sold with a matching throttle, and both feature a special twist axis on the stick itself to let you simulate a rudder. I’ve used both of them, and recommend them highly. The Thrustmaster also has a matching pedal assembly, which attaches directly to the throttle and looks great. You can purchase all three components together in a bundle. The Logitech G Pro Flight Rudder Pedals, on the other hand, aren’t quite as elegant, but they get the job done.
If you’re looking for an upgrade, consider the Thrustmaster Warthog HOTAS. The system has been in production for a long time, and for good reason. The $899 set has lots of metal components, and plenty of switches for even the most demanding sims. Paired with the Thrustmaster TPR pedals, you’ve got a setup that can take a lot of punishment and last for years to come.
Get a comfortable chair

Photo: Katie Hall for Polygon
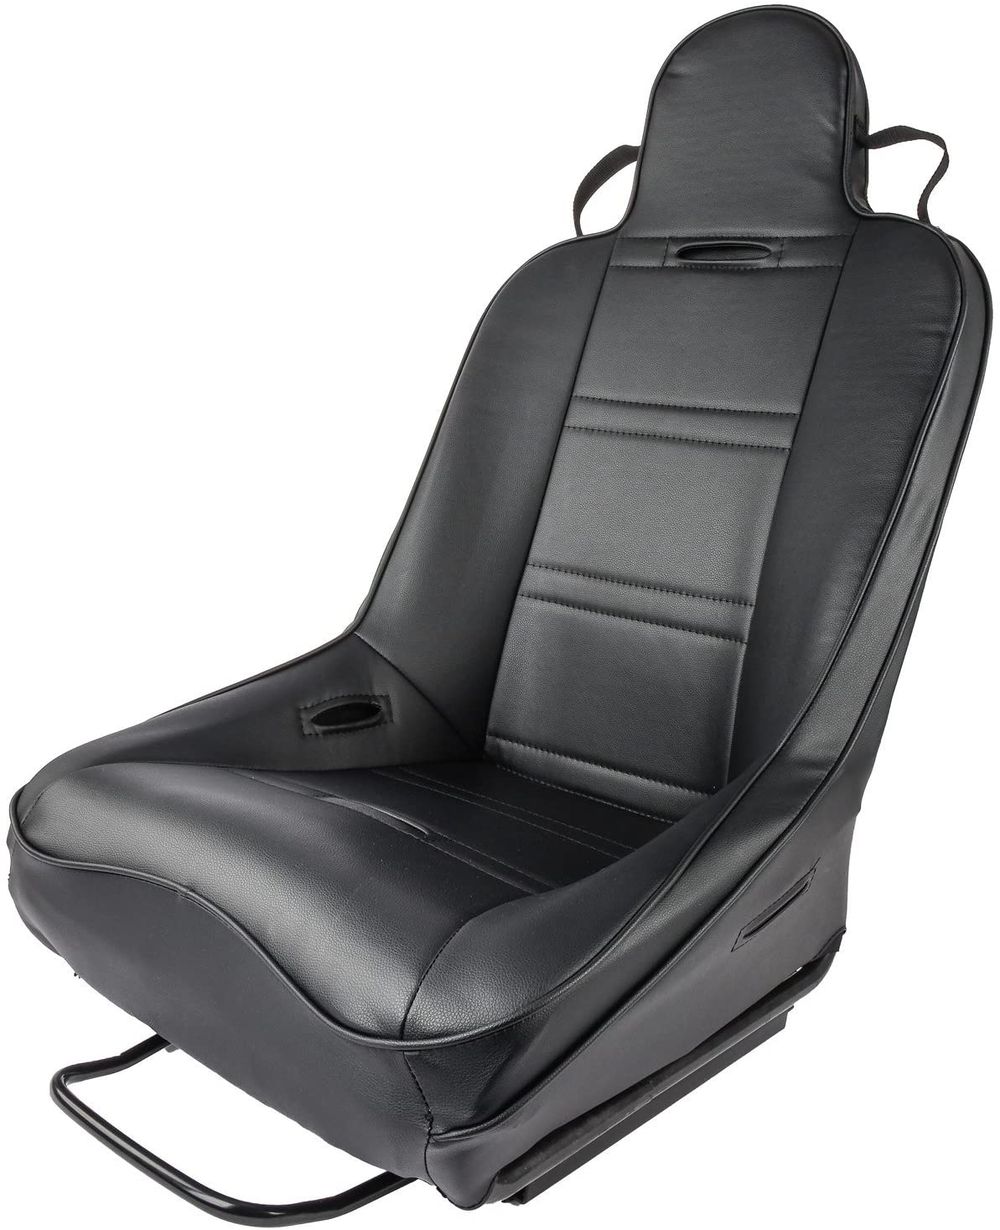
Next, you’ll need a seat. My recommendation? Go to a junkyard. Car seats are perfect for building a simpit, and just about any seat you can fit in will do. I pulled mine out of a 2002 Ford Taurus, just before donating it.
If you don’t have a junker sitting in the driveway, racing seats are pretty easy to come by on Amazon and fairly inexpensive. You’ll also find a decent selection at your local auto parts store. The benefit of buying a new seat is that it will likely be easier to mount than a junkyard car seat. New seats will have mounting points that are leveled off, designed for universal installation. The seat from my old Taurus, on the other hand, required some ugly wooden shims to get it to sit right.
If I had to do it over again, I’d likely go with something like this Jegs offroad seat, which comes with a flush mount and a spring assembly that allows you to slide it back and forth once it’s installed. You could also use the seat from an old office chair or a modern gaming chair. Just be sure that whatever you choose allows you to sit leaning backward a bit, especially if you plan on mounting rudder pedals.
Find a mounting solution
The next part is the hardest, and that’s fitting it all together.
For my build, I just used extra wood that I had lying around in the garage. The lower frame is all 2×8-inch pressure-treated timber that I had left over after building a garden. It’s meant to be used outdoors, which is overkill. But as a result, it is extraordinarily heavy and doesn’t move around. For the platform on top — where the seat gets attached — I used the solid top from an old dresser, but I could have just as easily used more of the same pressure-treated timber.
The important part is to make sure you extend your lower frame behind the seat by a foot or two, so that you don’t tip over backward. Mount your seat with some sturdy bolts, and you’re good to go.
The fiddly bit is attaching the flight stick and the throttle. All of the flight sticks that I’ve included in this piece have holes built into them to allow you to permanently attach them if you want to. You could slap together some hasty armrests, drill a couple of holes, and call it a day. But I actually found a much more elegant solution.
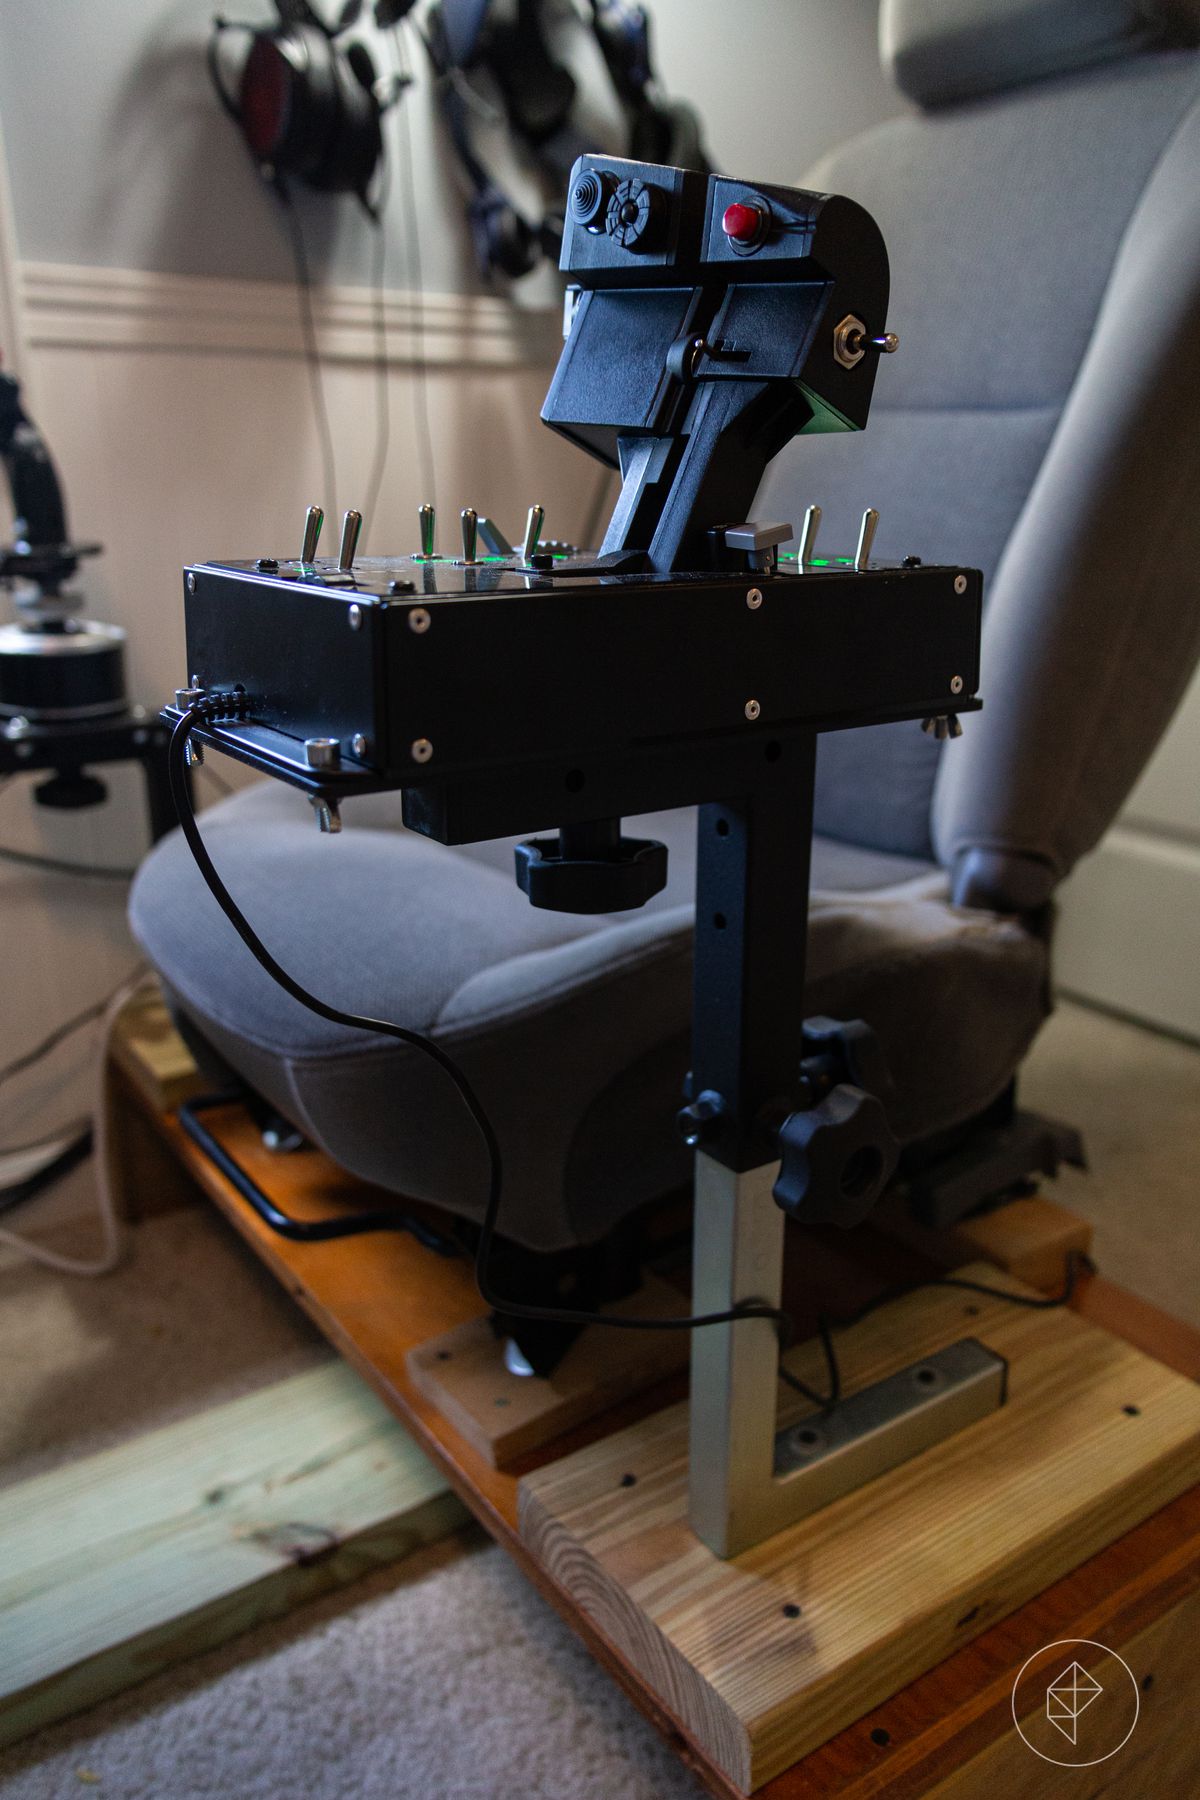
The team at OpenWheeler sells prefabricated racing rigs for PCs and consoles. They look excellent, and feature solid all-metal construction. The company also sells kits that allow those same racing seats to be converted into flight simulation seats. Those kits come with heavy, pre-drilled mounting plates for Logitech and Thrustmaster equipment. They’re fully powder-coated, and nearly indestructible.
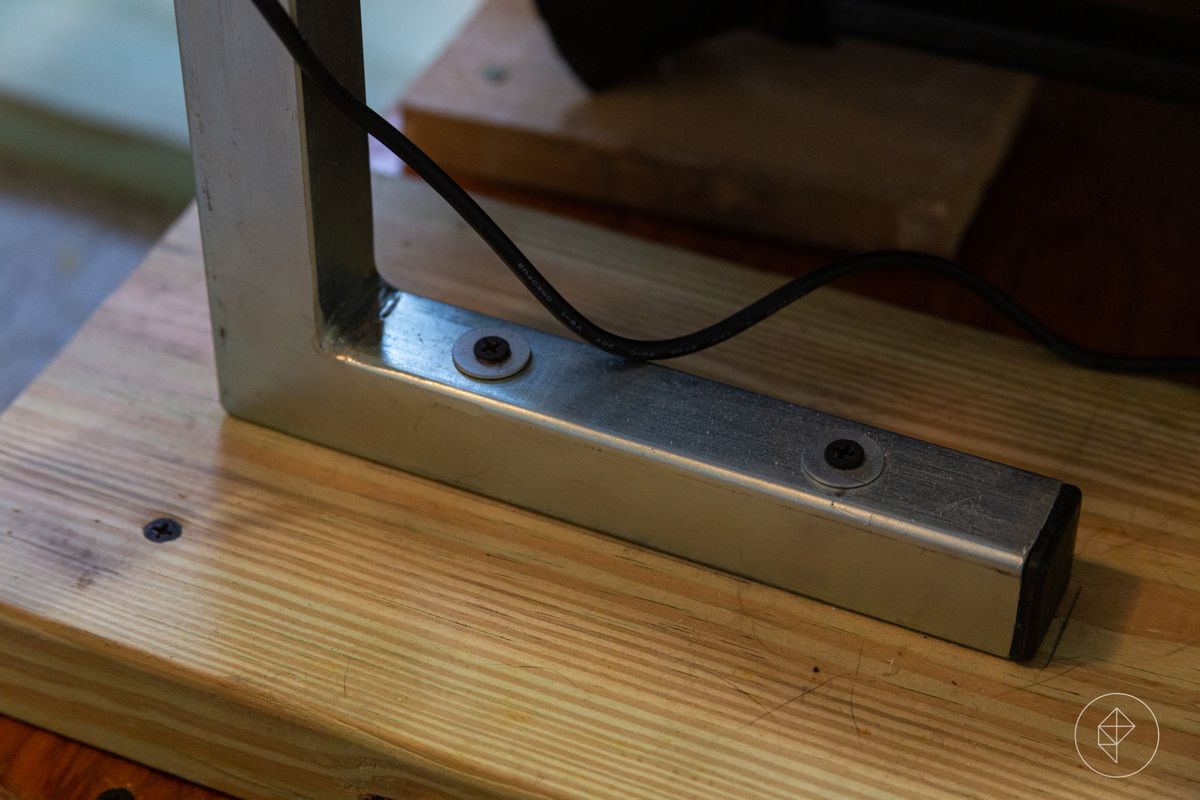
OpenWheeler’s mounting plates attach to a matching black metal tube, which is designed to slide over a bright silver metal arm. That means you can move the throttle and the flight stick up and down to get them in just the right position. The standard kit sold on Amazon only comes with enough parts to make a complete assembly for one side or the other, so be sure to reach out to the manufacturer and let them know you need two silver metal arms and an additional pair of tension knobs for your build.
Combined with a seat that moves back and forth, these OpenWheeler mounts will allow me to easily adjust the whole setup for different games and accommodate different-sized players.
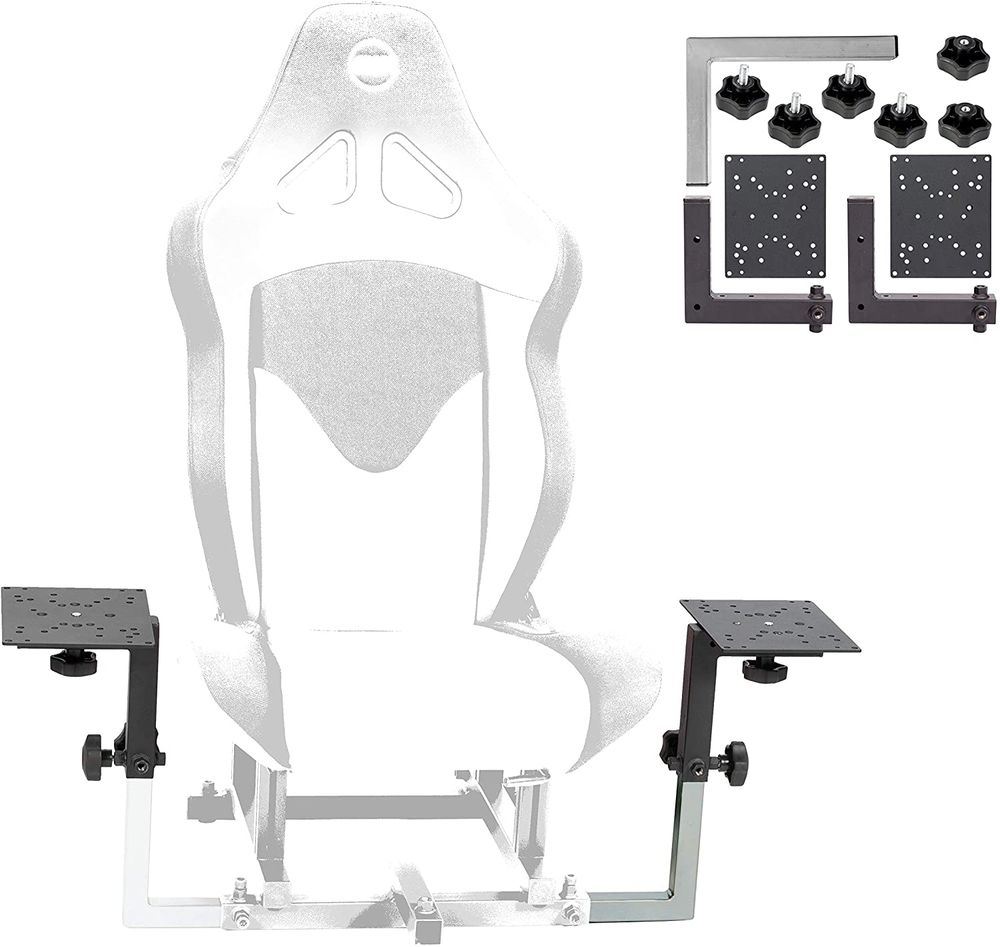
Flight Simulator mount kit
OpenWheeler sells kits that include everything you need to mount your HOTAS system to an existing OpenWheeler brand seat. If you’re building your own rig, however, you might be short a few parts. Contact the manufacturer via Amazon and they can help you out.
Photo: OpenWheeler
You still need a desk
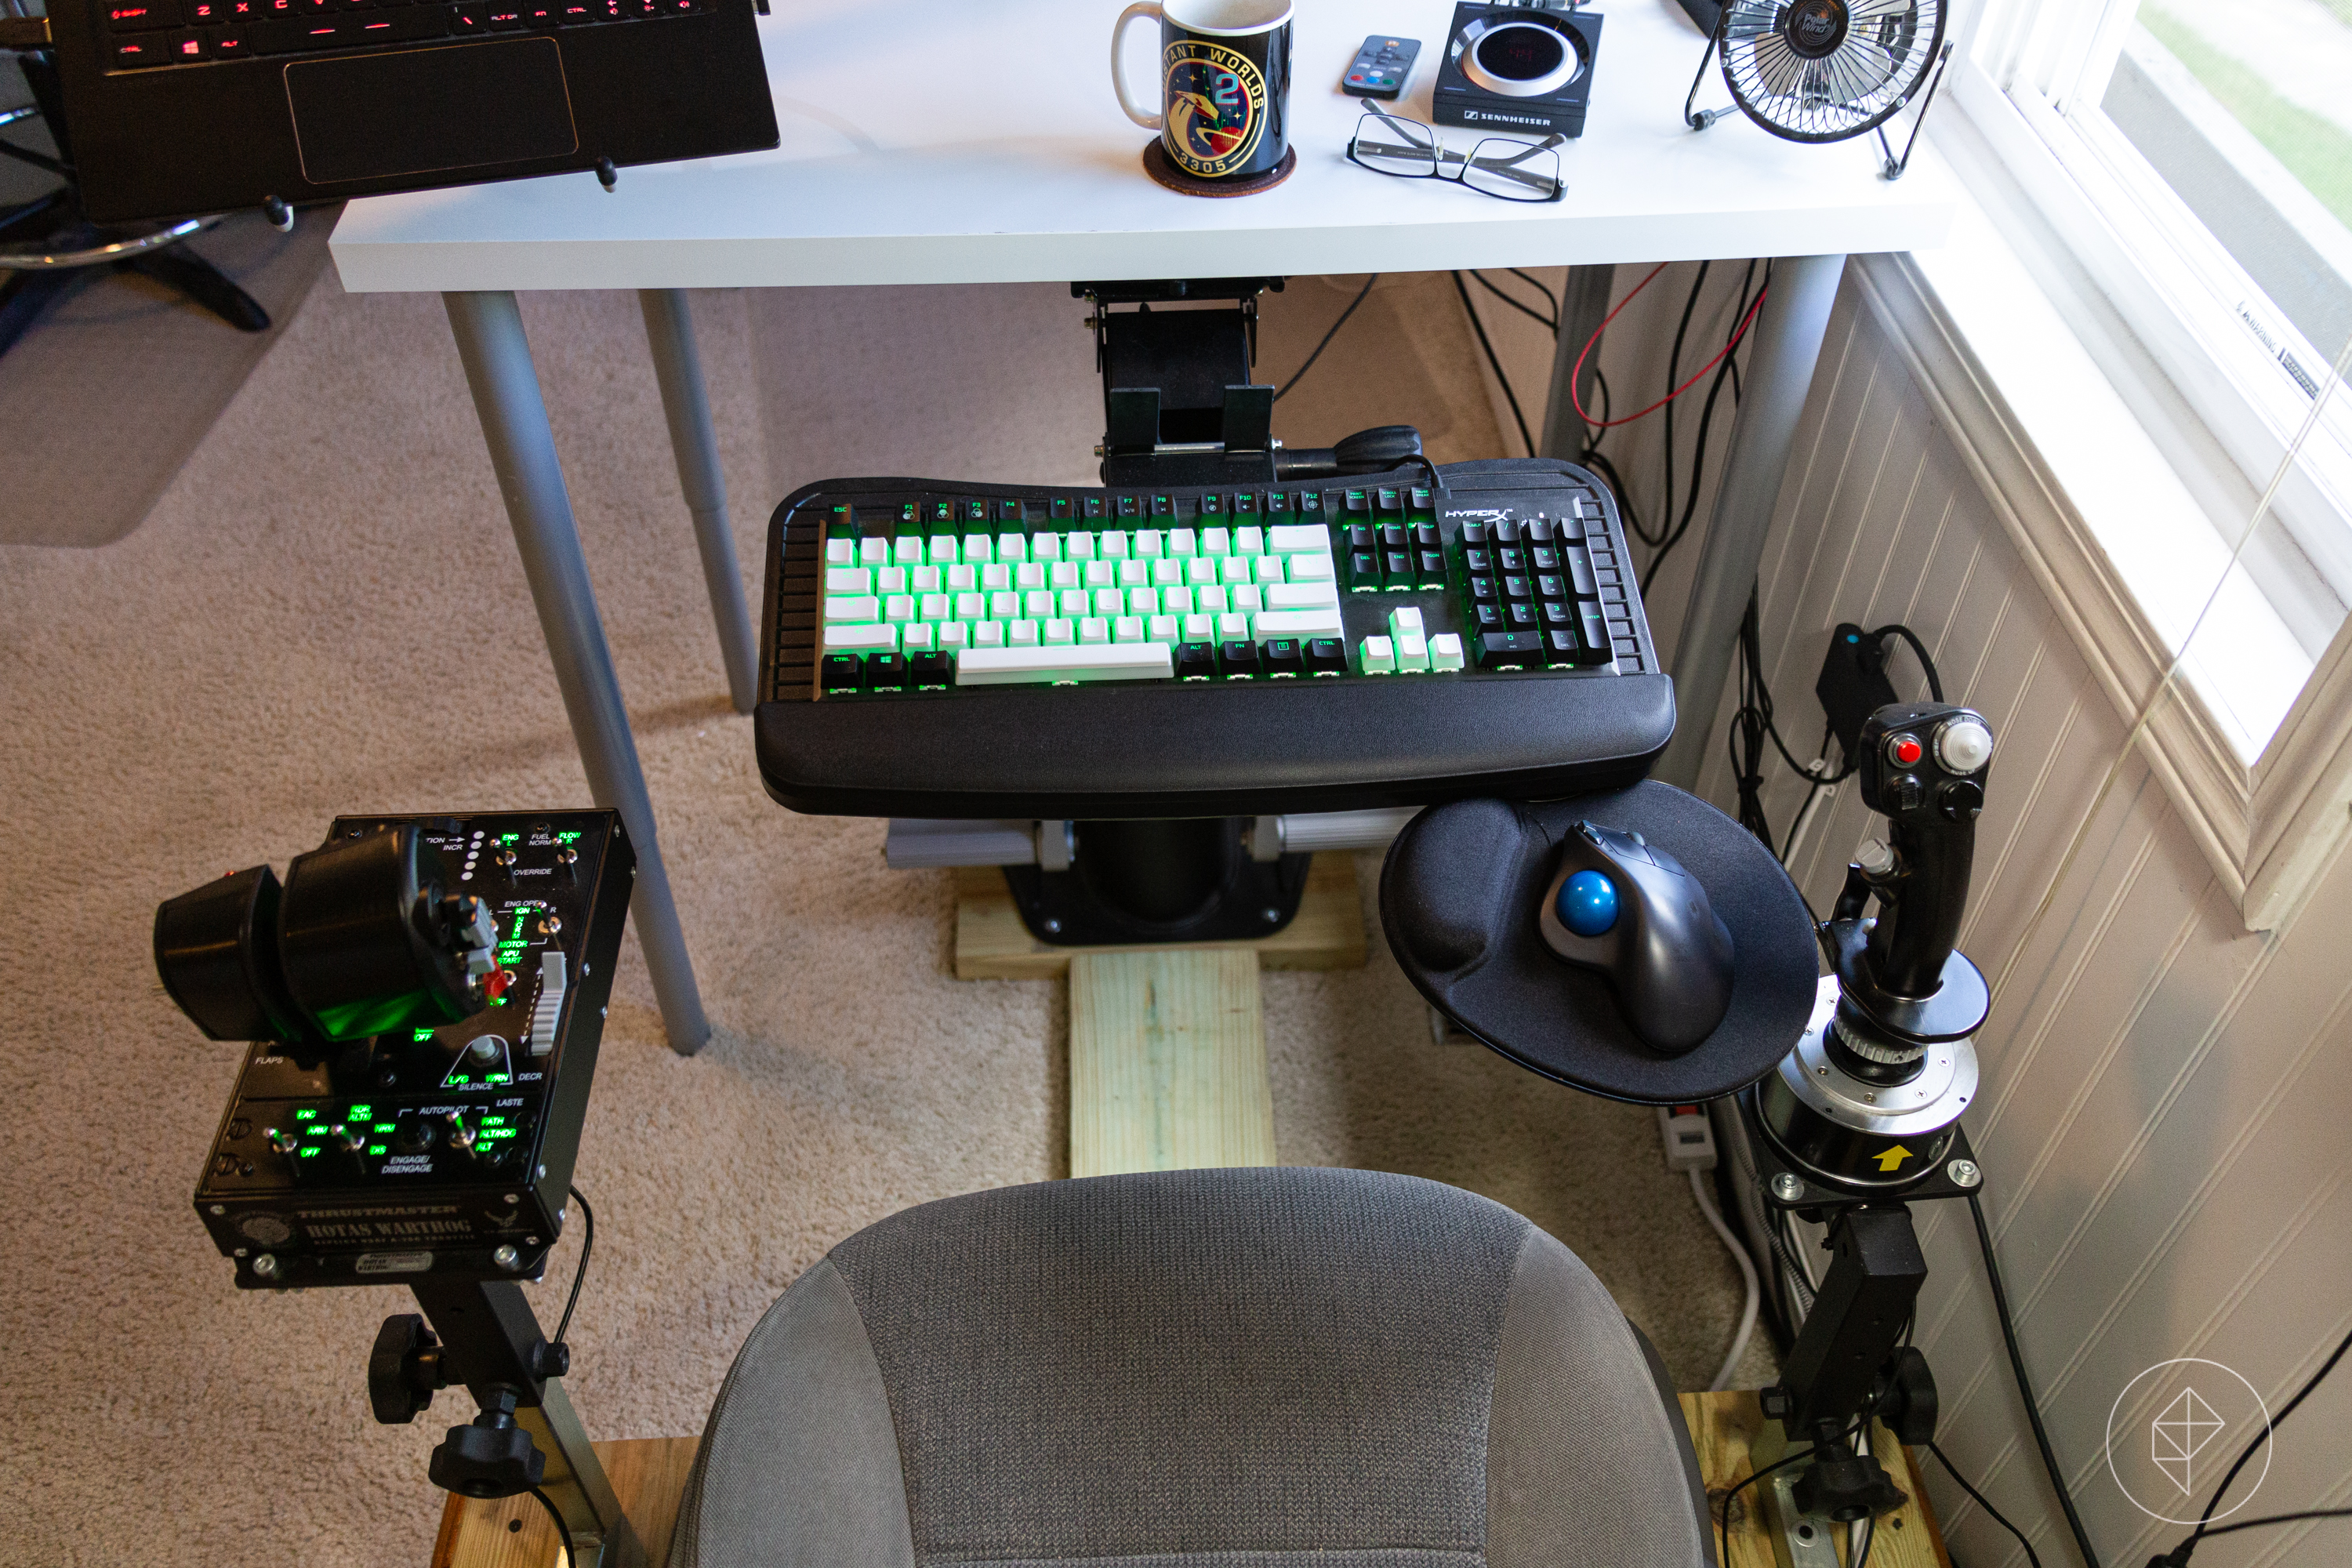
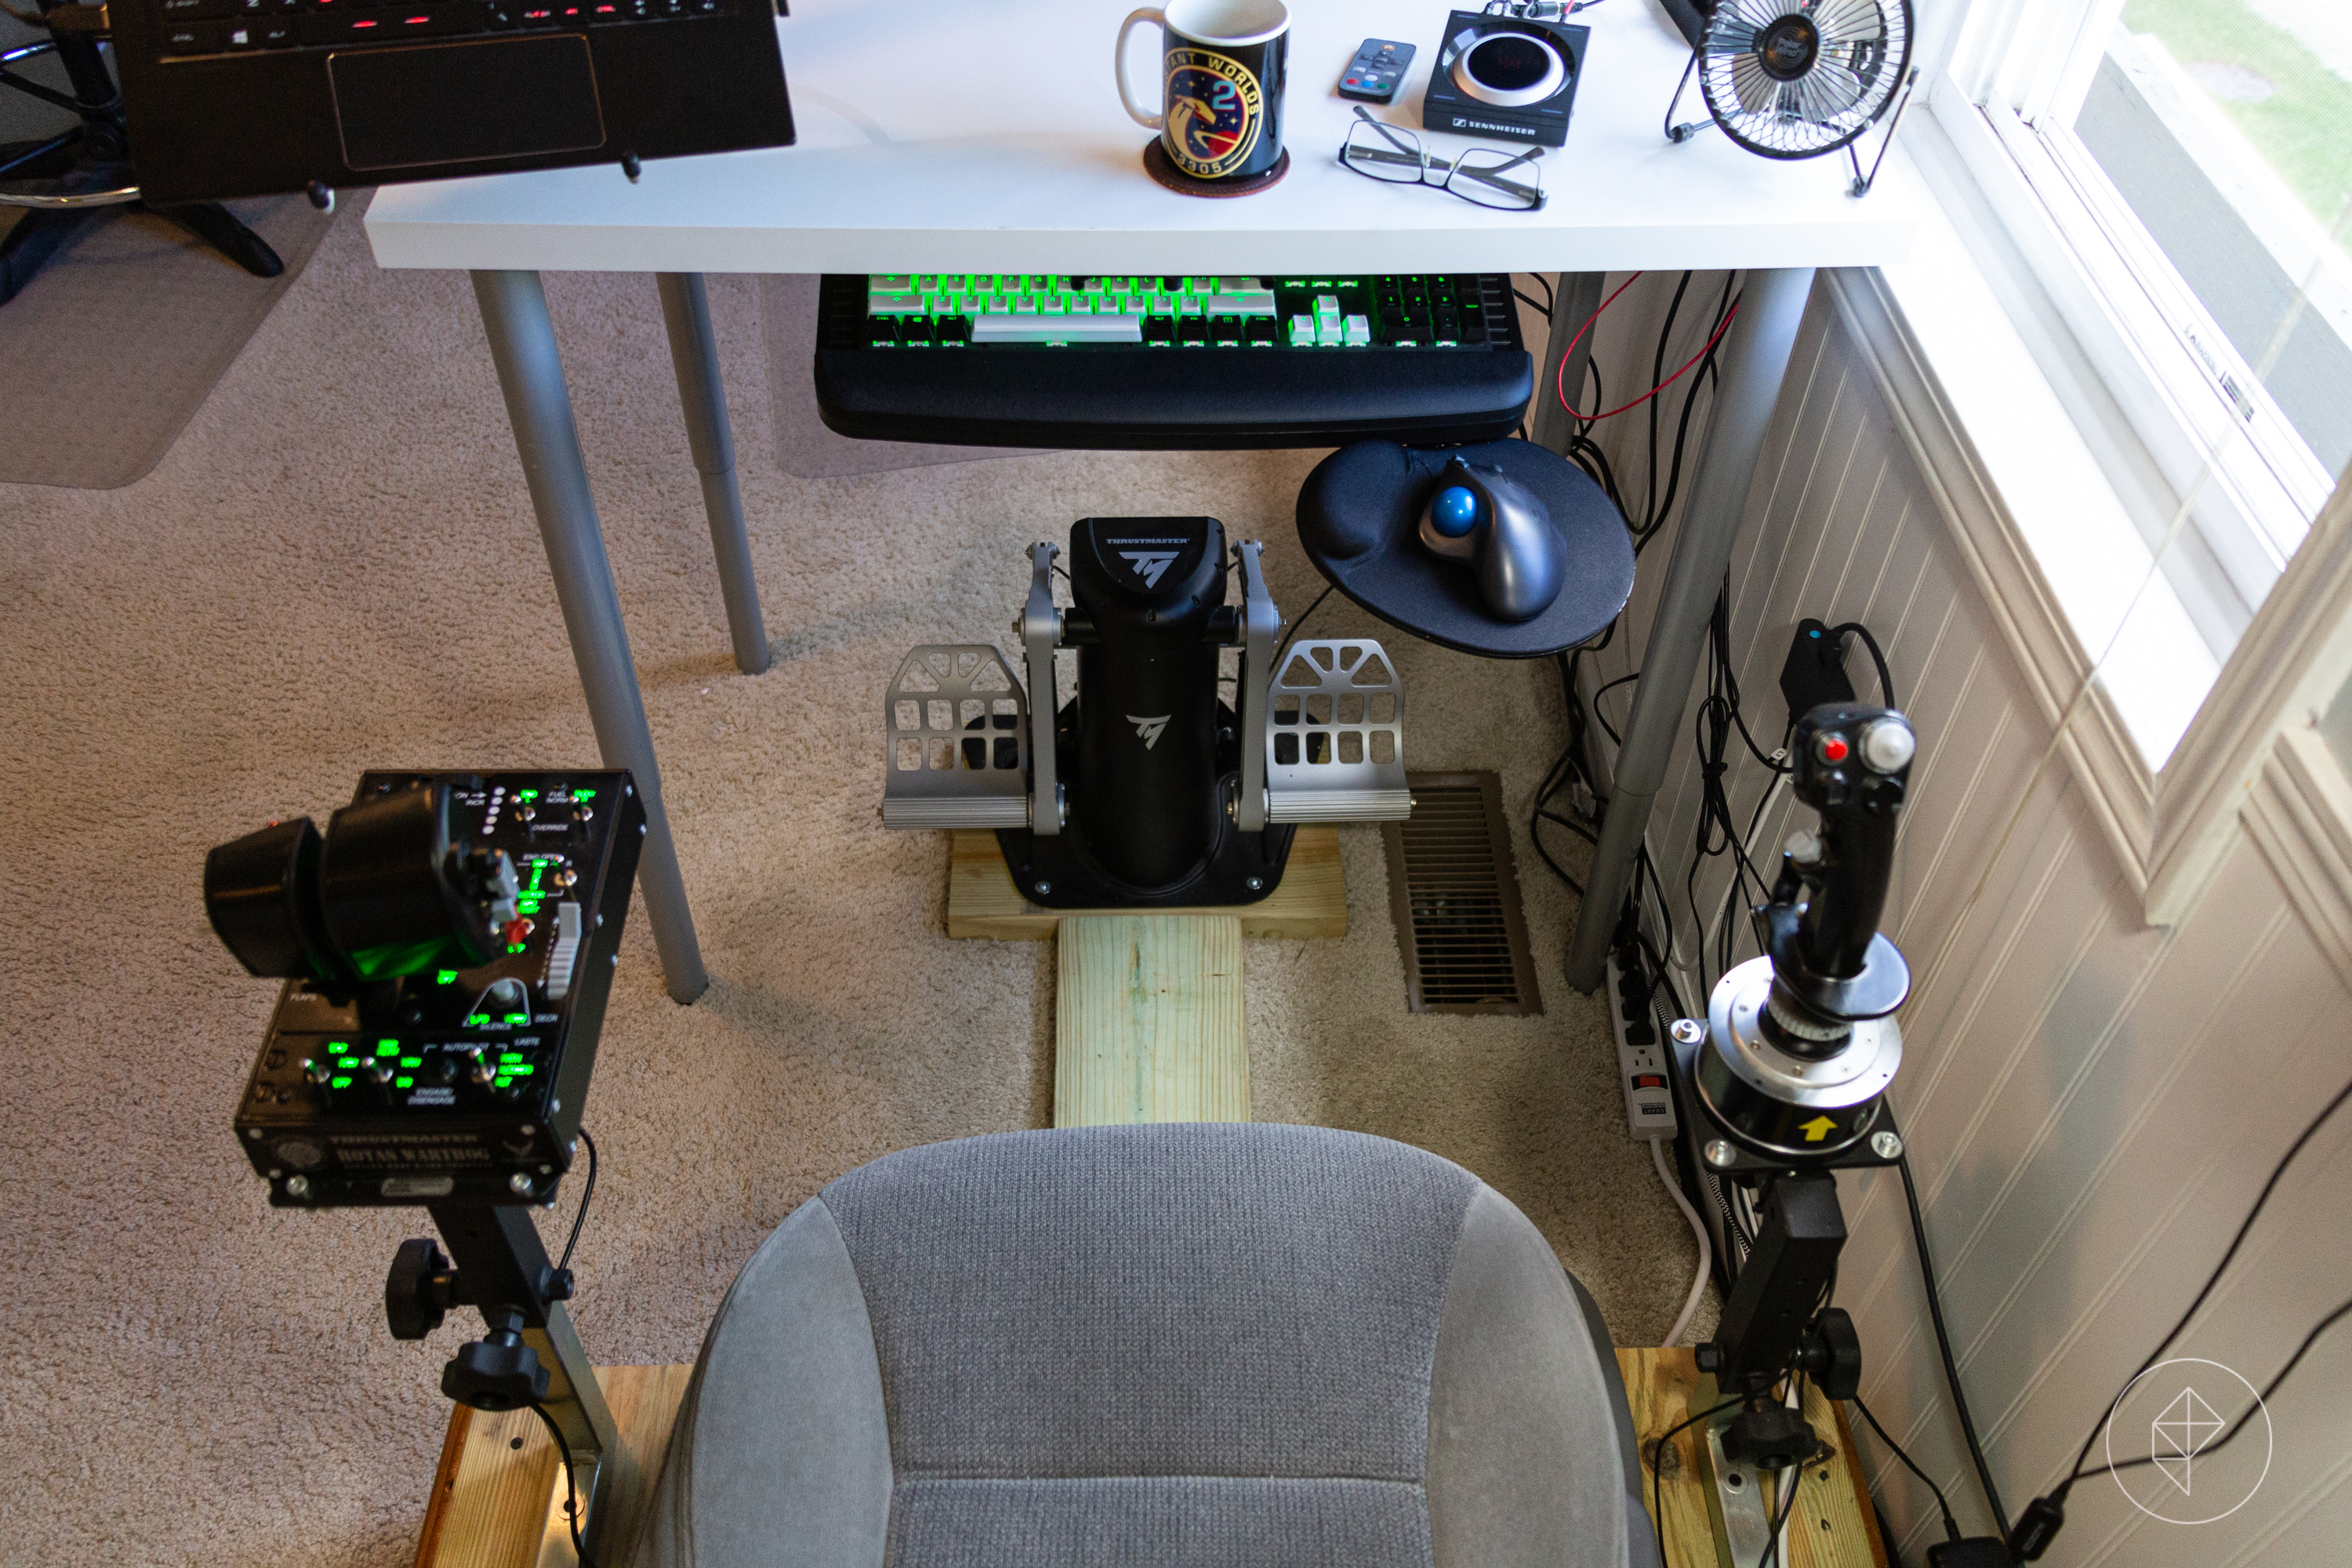
Photo: Charlie Hall/Polygon and Photo: Charlie Hall/Polygon
Even with all the buttons on your flight stick and throttle, even with a VR system, you’re still going to need a monitor and a keyboard. That means you’re also going to need a desk.
Luckily, I have a recipe that ensures it’s actually one of the least expensive parts of the build.
First, start with a desktop. You can get the Ikea Linnmon, like I have, for just $8.99. Alternately, you could get a nice big solid piece from your local hardware store, or slap something together with scraps you’ve got lying around the house. Next, I recommend adjustable-height legs. Again, Ikea offers an affordable solution in the Olov at $15.99 each. That’s a whole adjustable-height work surface for less than $75.
Adjustable height gives you three advantages. First, you don’t really need a monitor arm if you can’t afford one. Just raise the desk itself until you reach a comfortable height. Second, it gives you enough room to work the pedals underneath. Third, if you plan on playing Microsoft Flight Simulator when it comes out this year, you might want to remove the flight stick and replace it with a yoke. Yokes, like the Logitech G Flight Pro, traditionally mount to the front edge of the desk, so this design can effectively serve as an adjustable dashboard to mount a yoke onto.
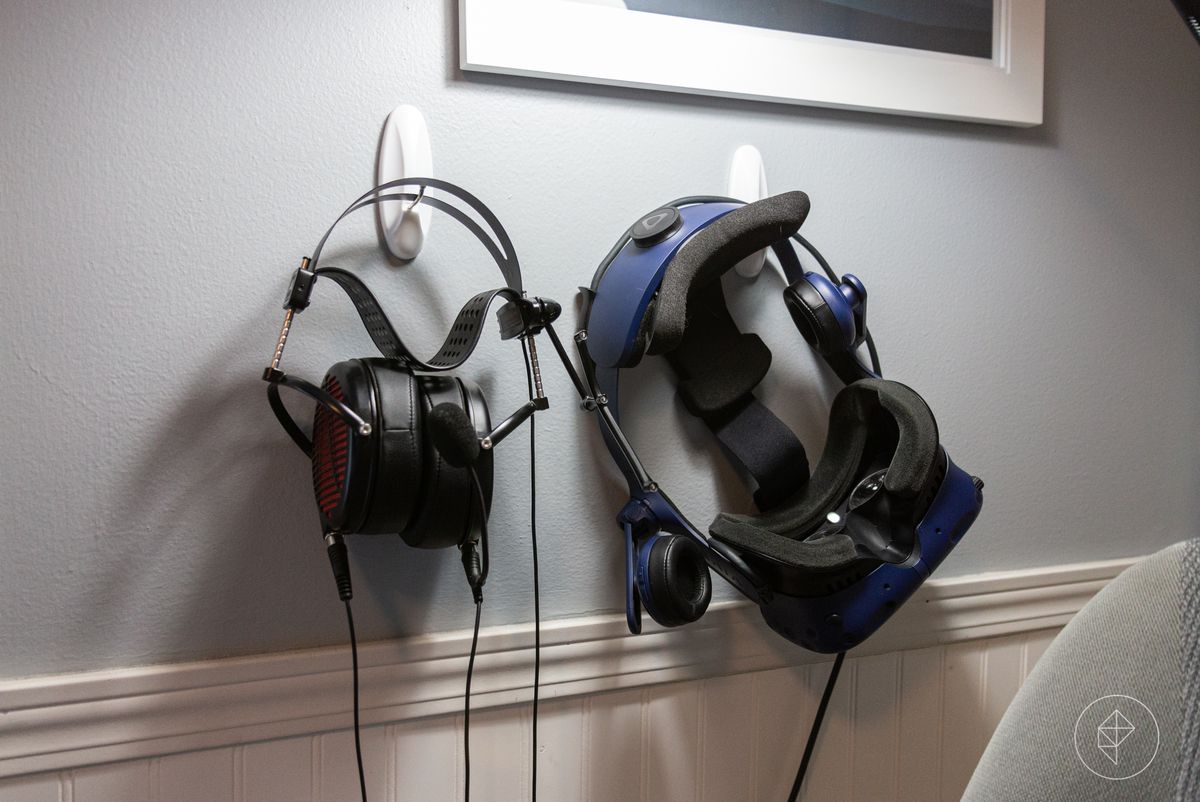
Photo: Charlie Hall/Polygon
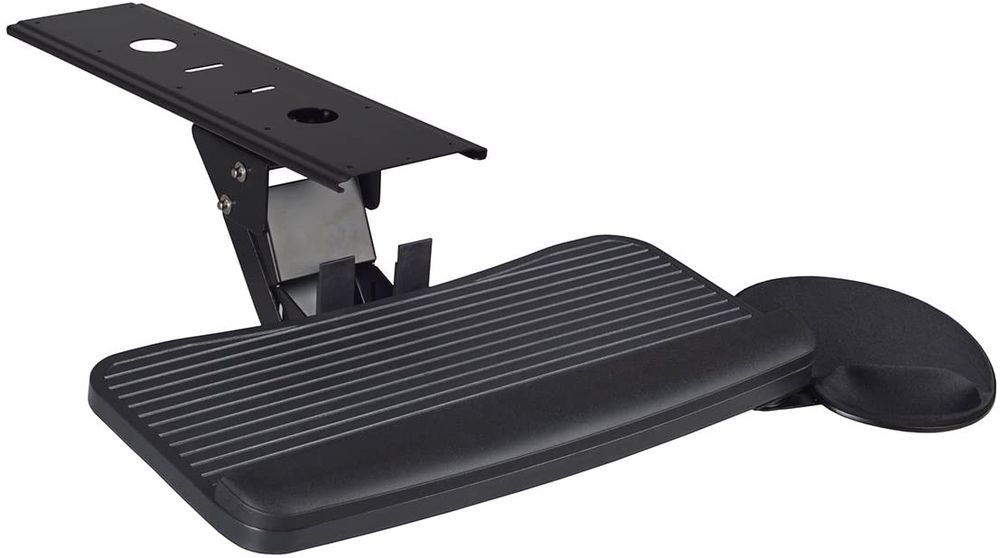
Finally, you’ll want to think about adding a keyboard tray. You can just put the keyboard on the desk and lean forward to hit the keys, but that tends to break the immersion and will eventually do a number on your back. It’s also really hard to do in VR.
I opted for a sliding, articulated keyboard tray by Regency, which moves forward, back, up, and down with a single tension wheel. At around $80, it wound up costing me more than the desk itself. But it slides out of the way when I need it to, allowing me to get up and out of the simpit. It also lets me lower the keyboard down onto my lap when I’m typing articles for work.
Parts list
That’s it! Hopefully you found some or all of these tips useful. Below is a list of all the hardware included in my home office simpit — minus the wood, screws, and the 2002 Ford Taurus. I included some notes on why they’re excellent choices for your build. Note that there are a few items that went into my build that are no longer manufactured. I recommended replacements for those as needed.
If you’ve got questions, drop them in the comments below. I’ll do my best to offer some guidance.
- I’ve been using this MSI GS65 Stealth, modified to 32 GB RAM with an extra 2 TB NVMe drive, as my main work computer since late last year. Coming from a desktop, I’m astounded that it can run VR as well as it does. It’s also nice being able to move any AAA game I want around the house.
- The 24-inch Dell S2417DG gaming monitor was a natural addition, as it features Nvidia G-Sync. The contrast is very high, however, and there’s no fine adjustment. That has caused me some grief in Elite, where most everything you look at is set against the deep black of space. But in just about every other game, it’s hardly noticeable. If I had my way, I’d have gone for the 27-inch version instead.
- The HTC Vive Pro is only the second VR system that I’ve spent quality time with after the original Oculus Rift. I’m a big fan of how it’s able to accommodate my reading glasses, thanks to a sliding front face on the HMD. The extra resolution is also handy when viewing buttons and dials on in-game instrumentation.
- I can’t fly outside of VR without the TrackIR 5 and the Track Clip Pro. They translate minuscule head movements into dramatic changes in your field of view, letting you look up, down, and all around while seated in the cockpit. I first learned to love them playing DayZ and Arma 3, where they give your character a neck that allows you to look in one direction and shoot in another. Now, whether I’m lining up my final approach in War Thunder or landing inside a space station in Elite: Dangerous, I consider them to be essential.
- Pretty much any keyboard will do, but you’ll want to avoid a traditional mouse with the Regency keyboard tray in this build. I’m a big fan of the Logitech M570 wireless trackball, which gives you all the flexibility of a mouse in a very small footprint.
- These Audeze LCD-GX gaming headphones are currently a reference set that I use as a benchmark for high- and low-frequency response for Polygon’s annual gaming headset roundup. The price point — $899 when purchased directly from the manufacturer — is outrageous, but the sound quality is extraordinary. You might take a look at the Audeze Mobius headphones instead, which include head tracking (akin to the TrackIR) that shifts the in-game sound field all around you. I have a feeling it will come in handy when Microsoft Flight Simulator launches, but it’s tremendously effective in MechWarrior 5: Mercenaries as well.
- The Sennheiser GSX 1000 is a stand-alone audio amplifier and digital-to-analog converter. I dig it because it allows me to set up a pair of satellite speakers and a pair of headphones, and switch between them with a single button press — without going into Windows’ audio settings.
- I’ve tried cheap amps for driving my speakers, but recently switched to the Fosi Audio TB10A Mini Power Amplifier. All the click and hiss I was used to hearing is gone. My speakers are from an ancient surround-sound system, but try these Polk bookshelf speakers instead.
- I really like Echogear monitor arms. Having used old-school Ergotron arms for a very long time, these are lighter and stronger by comparison. The price is also right at just $59.99 each. They pair well with the AmazonBasics notebook tray, which allows you to mount your laptop off the surface of the desk and easily move it out of the way when you need to.
- The desk shown above includes a white top — the Linnmon model — from Ikea, but other colors, sizes, and textures are available online. You can find table legs at Ikea as well. The Olov legs I used can be adjusted to roughly pub height, giving plenty of room below.
- A single Anker seven-port powered USB hub ties all my various bits of tech together. I should probably get a second one. There’s also a 10-port version that will allow you to power up to three additional devices that don’t need to be connected to your PC. The robust metal construction is ideal, especially if you’d like to mount it to the bottom of your desk to keep it out of sight.
- I’ve always thought that the Thrustmaster Warthog HOTAS and the Thrustmaster TPR Pedals were overkill, but after spending time with them for a few months, I finally see the allure. The metal switches are very satisfying, and after using my simpit as my primary workstation for the last few weeks, I have yet to break anything getting in and out of the rig.
- Late at night, I use Luminoodle bias lighting to mirror the custom blue HUD that I’ve modded into my version of Elite: Dangerous. It’s nothing fancy, but it makes a big impact when you’re flying through space. There’s also a handy remote that lets me easily switch between red, yellow, and bright white to match whatever game I’m playing at the moment.
- Of course, some rugged power strips are a must. You’ll need at least two, as well as a few 6-foot USB extension cables, some cable ties, and a few 3M Command hooks to keep your headphones and VR headsets tidy. Smaller 3M adhesive strips can also be used to mount other items — like the Vive’s micro controller — to the wall or underneath the top of the desk.

Thrustmaster TCA Sidestick Airbus Edition
The newest flight stick from Thrustmaster is a replica of the stick used to fly the Airbus A320. It’s also fully ambidextrous, including hot-swappable buttons on the left and right side of the stick. If you plan to build a two-stick setup — perfect for Star Citizen or MechWarrior 5: Mercenaries — they’re just the thing.
Vox Media has affiliate partnerships. These do not influence editorial content, though Vox Media may earn commissions for products purchased via affiliate links. For more information, see our ethics policy.

Toni Morrison was a celebrated American author whose novels earned worldwide recognition for their depth, artistry, and cultural significance. Her influential works continue to inspire readers and writers across generations.