For our ntower editors, it’s part of their daily job to take screenshots and videos on Nintendo Switch and transfer them to a PC or smartphone. However, we noticed during the conversation that everyone uses their own way to transfer the images from the Nintendo Switch to the desired device. Since some species were even new territory for one or the other, we have included them in the following guide. 5 ways to transfer screenshots and videos summarized.
1. Transmission via USB-C cable
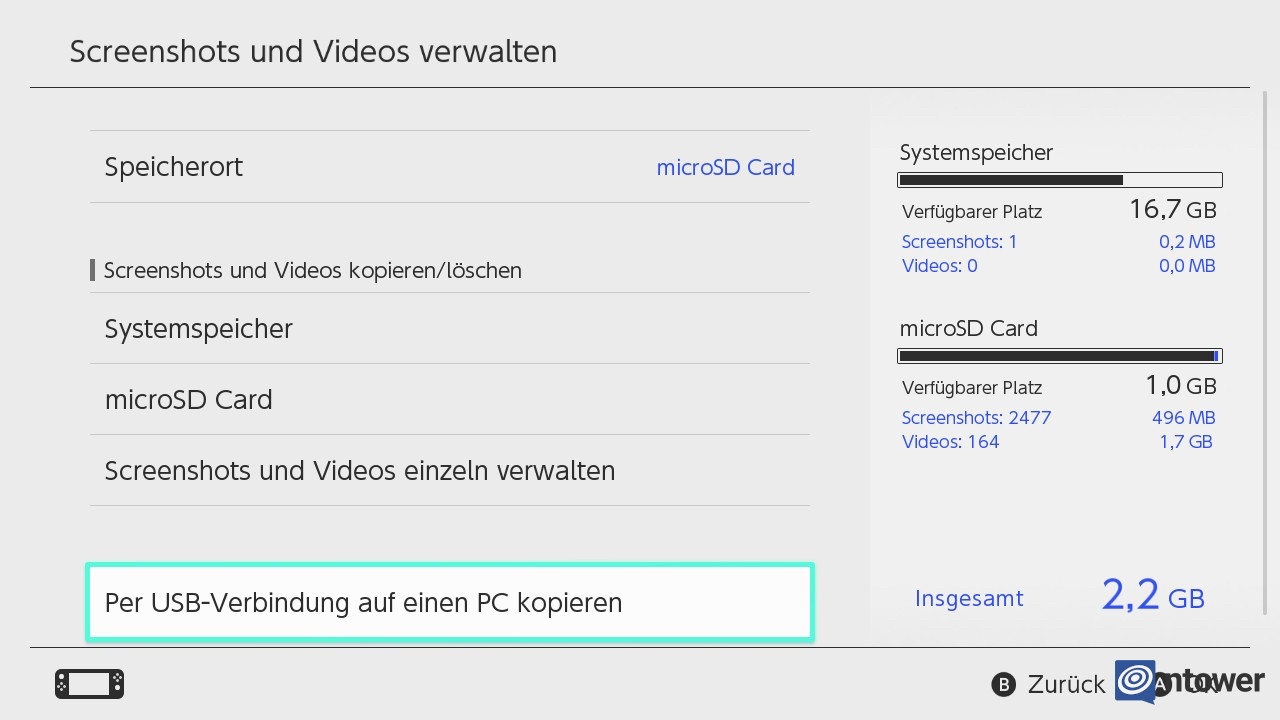
If you have a USB-C cable, this method is probably one of the easiest. Open settings on your Nintendo Switch and go to the Data Management section. Here you have to scroll down once and click on the point “Manage screenshots and videos“. Then you will find the “Copy to a PC via USB connection” button at the bottom, which activates the necessary function.
Then simply connect your Nintendo Switch directly to your PC and it will recognize the hybrid console as a data carrier. Using drag and drop, all you have to do is grab the desired images and videos and place them in the appropriate folder on your computer. By the way, the USB-C cable that comes with the Nintendo Switch Pro Controller is particularly good for this. This has the possibility of data transfer. However, please note that transferring via USB-C cable only works smoothly on Windows computers as they support the Media Transfer Protocol (MTP) default support. For other operating systems, therefore, you must add MTP via software or use one of the other transmission methods. However, in many cases, software and applications for MTP are paid, so we recommend alternative methods.
2. Transmission via Micro SD card
The basic steps work the same as the transfer to the PC. So, you need to open the settings again from the main menu, go to data management, but there, under the item “Manage screenshots and videos”, go to the microSD card area. Here you can first set whether your recordings should be stored in the system memory or directly on your microSD card. If you want to use transfer with a memory card more often, we recommend this as favourite place to select. Then you can simply remove them when the Nintendo Switch is off and plug them directly into your computer or card reader. There you can transfer individual recordings or the entire folder by dragging and dropping.
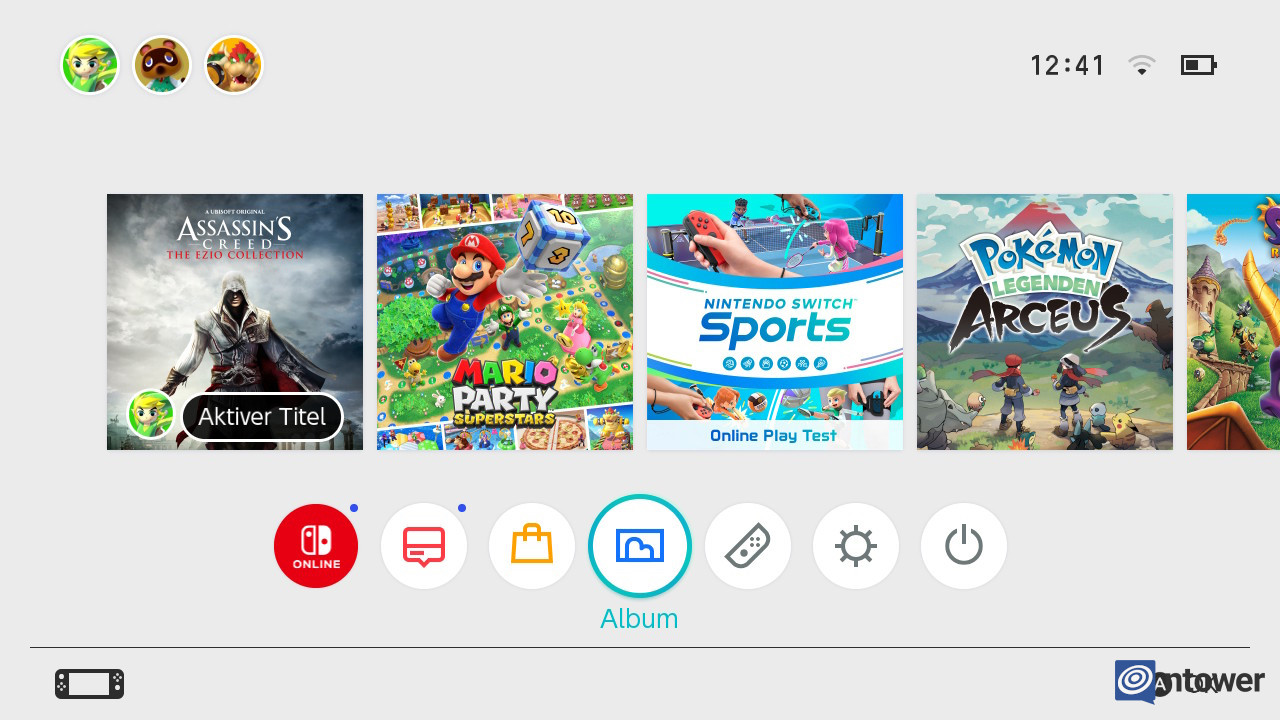
If instead you decide to store the images in your system memory, you can also transfer individual images to the microSD card. Just follow the steps above again and click “Manage screenshots and videos individually”. Here you can select all the recordings you need and click “copy” after opening them. They are already on the microSD card and ready to transfer. Alternatively, you can skip going through the data management menu by opening your album directly through the Nintendo Switch main menu.
3. Broadcast via Twitter or Facebook
A bit more cumbersome, but still a quick method for many, is streaming via Twitter and Facebook. If you have linked your accounts to the hybrid console, you can post your recordings directly to social media channels. This means that you can access and save the images from any of your devices where you are logged into the accounts. This is not only easy with PC, but also your smart devices are suitable for this. However, if you don’t want to share your recordings with everyone, you must first register your accounts on the private mode change. This gives you exclusive control over your screenshots and videos.
To do this, simply open your album through the main menu and select the images you want. Click on one of them, and then select the “Publish” item. You then have the option to select one or more images for your channels. Once you’ve selected your Nintendo Switch profile in the next step, all you have to do is decide whether you want to post the recordings via Facebook or Twitter. You can also add text to go with your post. This is where the hashtags associated with the game come in handy. With a final click on “Publish” you have completed this step.
4. Transmission via smart device
Currently, the most common method for many to transfer screenshots and videos to smart devices is through the Nintendo Switch Wi-Fi connection. Nintendo introduced this feature with the Version 11.0.0 a. To use it, it is important that you are in the recordings folder of the hybrid console. Then select one or more of your images to transfer and click “Send to Smart Devices”. A window will then open in which a QR code will appear.
As soon as you’ve scanned this with your smart device, you can connect directly to the Nintendo Switch. A second QR code will then appear, which will also need to be scanned. Your smart device’s browser will open and show you the desired images. By clicking on it, you can view it again and save it to your smartphone or tablet.
5. Transfer via “SwitchBuddy” app

In our opinion, the SwitchBuddy app offers great added value!
© SwitchBuddy / Astley Baker Davies / Hasbro / Outright Games Limited.
The SwitchBuddy app offers one last possibility to transfer images without complications. It is based on the same principle as regular streaming via smartphone, but offers a number of advantages. On the one hand, you only have to scan one of the two QR codes, since you no longer have to depend on the browser. Instead, all selected media is displayed directly in the app and you can easily save it to your photos folder or send it directly via AirDrop, WhatsApp, or Discord.
In addition, SwitchBuddy allows you to connect directly to your iCloud-Create an account so that the recordings end there. This gives Apple users access to recordings from all of their devices, so they can quickly share them on a tablet or edit them on a computer. Plus, you can also save all your recordings directly to the app so you don’t have to go back to your usual storage locations. Also, the app offers different color schemes and is completely free, so you can access it without hesitation.
During our testing phase, we learned to love the SwitchBuddy because everything feels a bit easier than the usual Nintendo ways. Hopefully this won’t be blocked in the future as the app has definitely streamlined our work in the editorial department.
We hope our guide has helped some!
How do you transfer your screenshots and videos? Let us know your favorite streaming method in the comments!

Introvert. Beer guru. Communicator. Travel fanatic. Web advocate. Certified alcohol geek. Tv buff. Subtly charming internet aficionado.


